In this article, we’ll talk about some options for testing Event Espresso 4. This is recommended before you open your site for accepting live registrations.
Quick start testing for Event Espresso
If you are short on time and need to launch soon, then you can register for your event as if you were a guest to check that things are working.
One way to do this would be to register for your event using a different web browser than the one that you are currently using to edit for event. For example, if you are using Firefox for creating your event, then try registering for your event using Chrome or Safari.
A better way to test Event Espresso
A more thorough way for testing would be to duplicate an event and complete a registrant. This will allow you to test the event without adding affecting any limits that may be setup on the event.
Step 1) Create an event using the event editor and then publish it. It should be setup just as you would like as in the next step you’ll be creating a “copy” which will then be used for testing. This will leave your original event as-is so it is not affected.
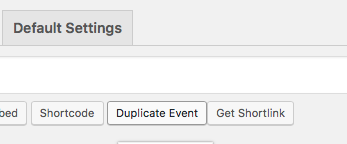
Step 2) Click the Duplicate Event button which appears in the top area of the event editor under the event title. Here is an example of how it appears:

Step 3) Go ahead and publish the event
Step 4) Open the event that was recently duplicated in an alternative web browser. For example, if you are currently editing your event in Chrome, then try registering for your event in Opera, Safari, or Firefox
Step 5) If this is a paid event, then confirm that the payment is applied and that you receive a registration approved email as the event admin (event organizer) and a registrant. If this is a free event as in no cost, then no payment will be needed and you just need to confirm that the registration emails are received.
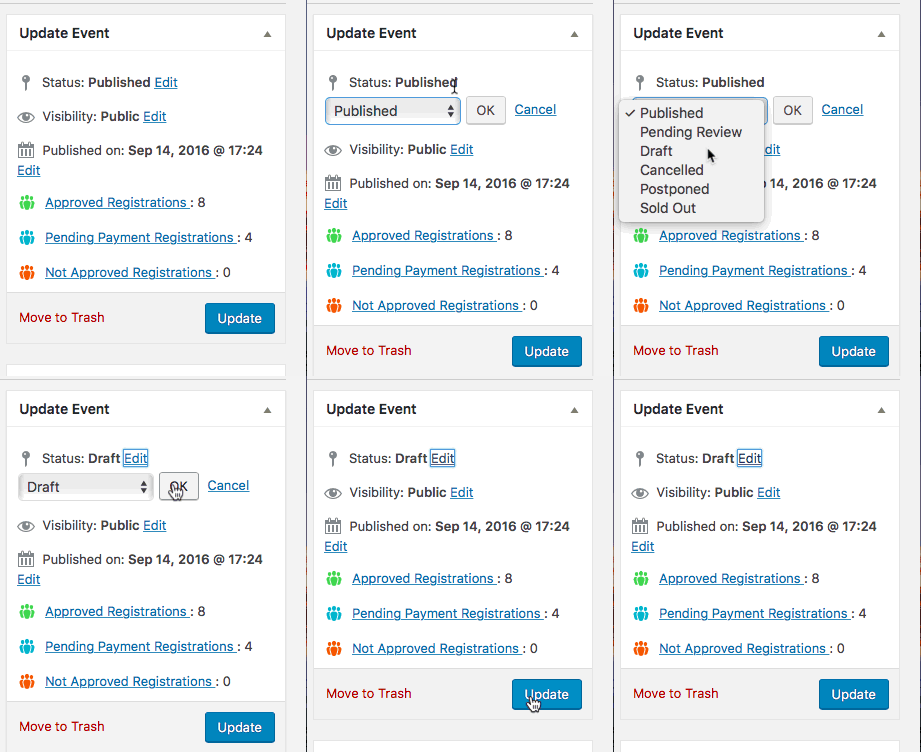
Step 6) After you have finished testing, then update the event status from Published to Draft. This can be done through the top right area of the event editor. Here is a quick walkthrough:

Removing test registration information
After testing, you may want to hide registrant information or remove it from your site.
If a registration is free as in no cost, then you can trash and delete a registrant through the registrations overview screen. This can be found in Event Espresso –> Registrations.
If you have registered for a paid event, then you’ll need to remove the payment first. Then you’ll be able to trash and permanently delete the registration. Go to Event Espresso –> Transactions and then click on the transaction for the registration. Scroll down about half way down the page and look for Payment Details area. Here is an example:
Now click on the trash can icon to delete and then confirm the removal of the payment.
Afterwards, you can go to the Registrations overview screen (Event Espresso –> Registrations) and trash and permanently delete the registration.
