In this guide, you’ll learn about the Messages System in Event Espresso which handles email notifications.
The Messages System triggers email notifications under certain conditions and it can be found in WP-admin (WP dashboard) –> Event Espresso –> Messages. For example, the registration approved message type is used to notify an event author (event admin) and the registrant/attendee about a successful registration.
Message Activity
Login to your WordPress dashboard (WP-admin) and go to Event Espresso –> Messages. You’ll now be viewing the Message Activity screen which shows email notifications with various statuses.
A legend is located at the end of the page which describes the various options and statuses. The important thing to remember here is you should see primary sent notifications which have a status of green. This means that your email notifications are being generated and sent.
Default Message Templates
From your WordPress dashboard (WP-admin), go to Event Espresso –> Messages –> Default Message Templates. Look in the top right corner of the screen and click on Screen Options. Then change the value pagination value to a higher value such as 20 and save changes. This will let you see all message types on one page.
Event Espresso has three types of messengers:
- Email – used for sending out a notification (e.g. an email notification about a successful registration)
- HTML – used for showing HTML generated content such as an invoice or a receipt
- PDF – used for generating a PDF version of an HTML messenger such as receipt or invoice
Now we’ll look at the Registration Approved message type which will be one of the most used message types. It is responsible for notifying an event admin and an attendee/registrant about a successful registration. If an event is free as in no cost, then this message type is triggered right after the registrant/attendee submits their contact information during registration checkout. If a registration is paid, then they will receive a status of registration approved and this message type will be triggered after they share their contact information including any custom registrations questions AND pay for their registration(s).
Here is a screenshot of how the Registration Approved message type appears in the Default Message Templates screen:
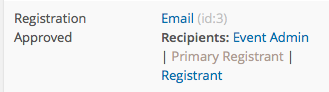
The blue Email link means that this is an email-based messenger. Next are the recipients which have the following options: Event Admin, Primary Registrant, Registrant.
For the Registration Approved message type, the event admin and registrant are enabled by default as they appear in blue which means they are active. Primary registrant appears in a grey color which means that is is not enabled or inactive. A recipient for a message type is enabled if there is a valid shortcode and/or email address in the TO field. A recipient for a message type can be disabled or made inactive by removing a shortcode and/or email address in the TO field and saving changes.
Edit a message type through the event editor
The messages editor will allow you to make changes to the message type for a specific recipient. Remember that the recipients can vary between different message types.
We’ll explain how to use the messages editor with an example (see below).
Send notifications to multiple recipients
Following our earlier example about the Registration Approved message type, lets say that you wanted to notify the event admin (event author) and another recipient. Here are the steps to make that change.
From the Default Message Templates screen, look for the Registration Approved message type and then click on Event Admin. On the next screen, you’ll see this message type in the messages editor.
You can click on the image below to see larger image with annotations:
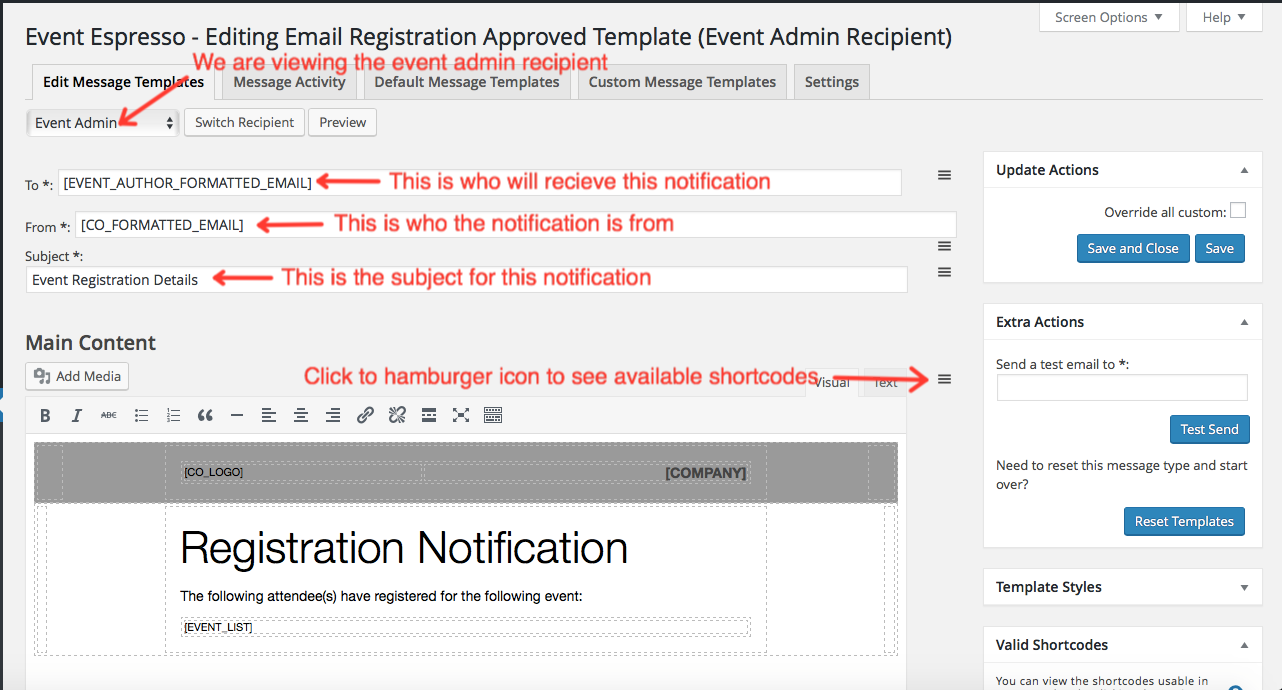
Now look at the TO field which has this shortcode by default:
[EVENT_AUTHOR_FORMATTED_EMAIL]
Add your additional email address in the following format and then click on the Save button to save changes:
[EVENT_AUTHOR_FORMATTED_EMAIL],[email protected]
Now each time a successful registration occurs, an email notification will go out to the event admin and the additional email, and the registrant/attendee.
Turn off a recipient for a specific message type
From the Default Message Templates screen, look for the message type that you are wanting to edit and then click on the recipient. On the next screen, remove the content from the TO field and save changes.
Disable a message type completely
From your WordPress dashboard (WP-admin), go to Event Espresso –> Messages –> Settings.
Along the top, you’ll see links for Email, HTML, and PDF. You can click on the different types of messengers and then drag and drop a message type over to the inactive area which is on the left side of the screen.
Note that the PDF option does not have individual options for invoice or receipt. If a messenger type has been disabled for the HTML option, then the PDF option will also be disabled.
Custom Message Templates
From your WordPress dashboard (WP-admin), go to Event Espresso –> Messages –> Custom Message Templates.
By default, this screen won’t have any message types showing. Once a custom message type has been created, then it will appear here. A common reason for creating a custom message type would be for sending specific information for an event.
To do this, go to the Default Message Templates screen and then look for the message type that you are wanting to edit. For example, if you wanted to send a custom email notification after a successful registration, then the Registration Approved message type could be used. On the left side of the screen, you’ll see a Create Custom button.
Click on the Create Custom button for the message type that you want to customize. You’ll then be taken to the messages editor. Go ahead and type in a unique name (e.g. Registration approved for Summer Music Festival) so this custom message type will be easily recognizable. From here, you can make your changes and then saveo
The next step is to connect this custom message type to your event. Go to Event Espresso –> Events and then look for your event and click on it.
You’ll now be viewing the event editor for your specific event. Scroll down towards the end of the page and look for the Notifications area. Then click on the type of Messenger such as Email and you’ll then see all available message types. A dropdown menu will appear next to each message type. Click on the one that has your custom message type and select your custom message type. For example, if you recently created a custom Registration Approved message type, then you’ll want to click on the dropdown menu for the Registration Approved message type and select your custom message. Afterwards, you can save changes to your event.
Settings
Login to your WordPress dashboard (WP-admin) and go to Event Espresso –> Messages –> Settings.
This page shows the settings for the messengers which are Email, HTML, and PDF. You can click on a specific messenger to view the individual message types and if desired, you can drag and drop to disable or enable a message type.
There is also an option for changing when email notifications are sent. For the best performance, you’ll want to leave this setting as-is.